I apologize for the delay between Part One and this part of my Beginner’s Guide. Unfortunately, my job has a habit of getting in the way of my hobby…
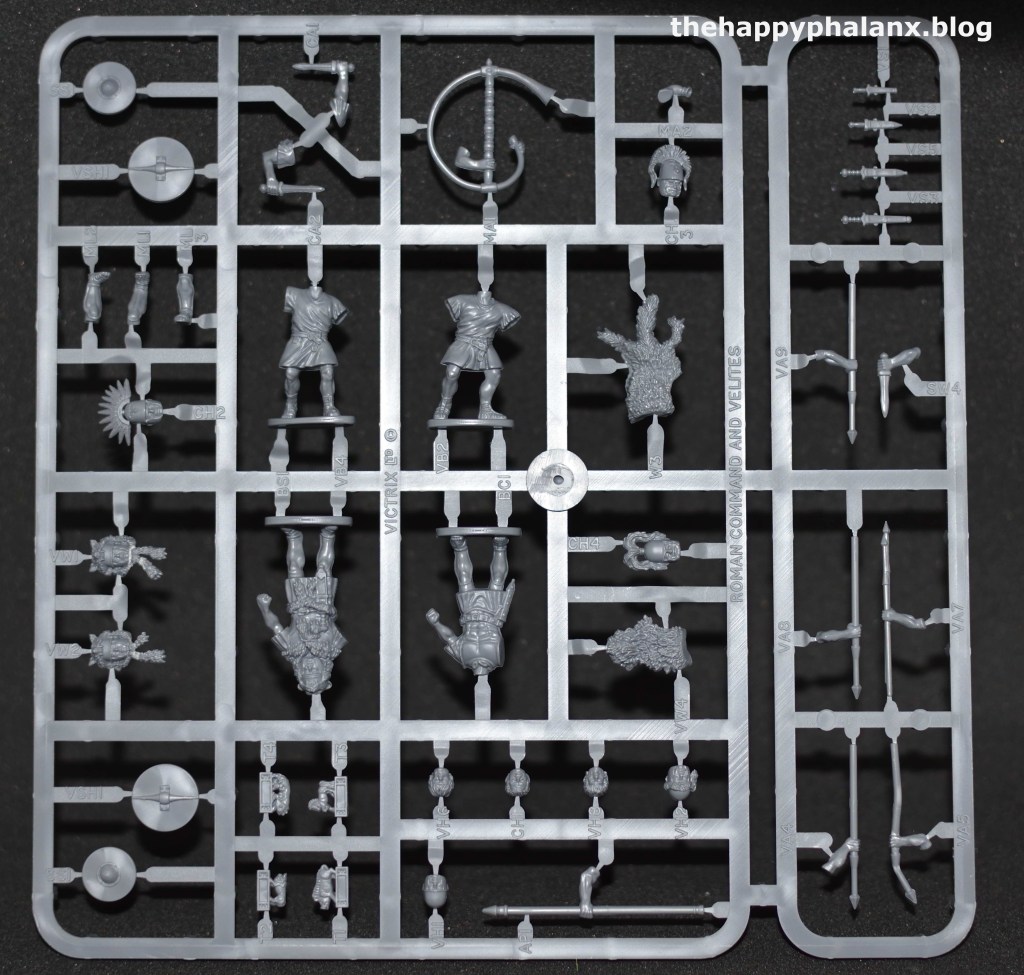
Once you’ve collected some basic tools and some paints, it is time for the fun to begin! Once upon a time, during the 1980s and even earlier, most of the minis came molded in a lead based metal. Once people began to realize that playing with lead may not be the healthiest option for people, they switched to lead-free metal minis, and then into resins and plastics for them. In my experience, most of the minis today are molded in plastic, frequently a hard plastic. Although some companies my produce minis in a less expensive softer plastic, I find that those ones don’t provide as crisp and as sharp of details. For my examples for prepping minis for painting, I have chosen two velites (my gaming group still hasn’t agreed if it is properly pronounce VEE-lit-ays or WEE-lit-ays in Latin) from Victrix’s Rome’s Legions of the Republic (I) set. As an aside, I absolutely love working with Victrix’s minis for my historical armies, they are fantastic quality and offer an incredible range of options for customization.
This is where it all begins, a plastic sprue full of possibilities! You can see the number of different heads, arms, and other options available here, and this is only one of several sprues you may find with options for minis!
Step One:
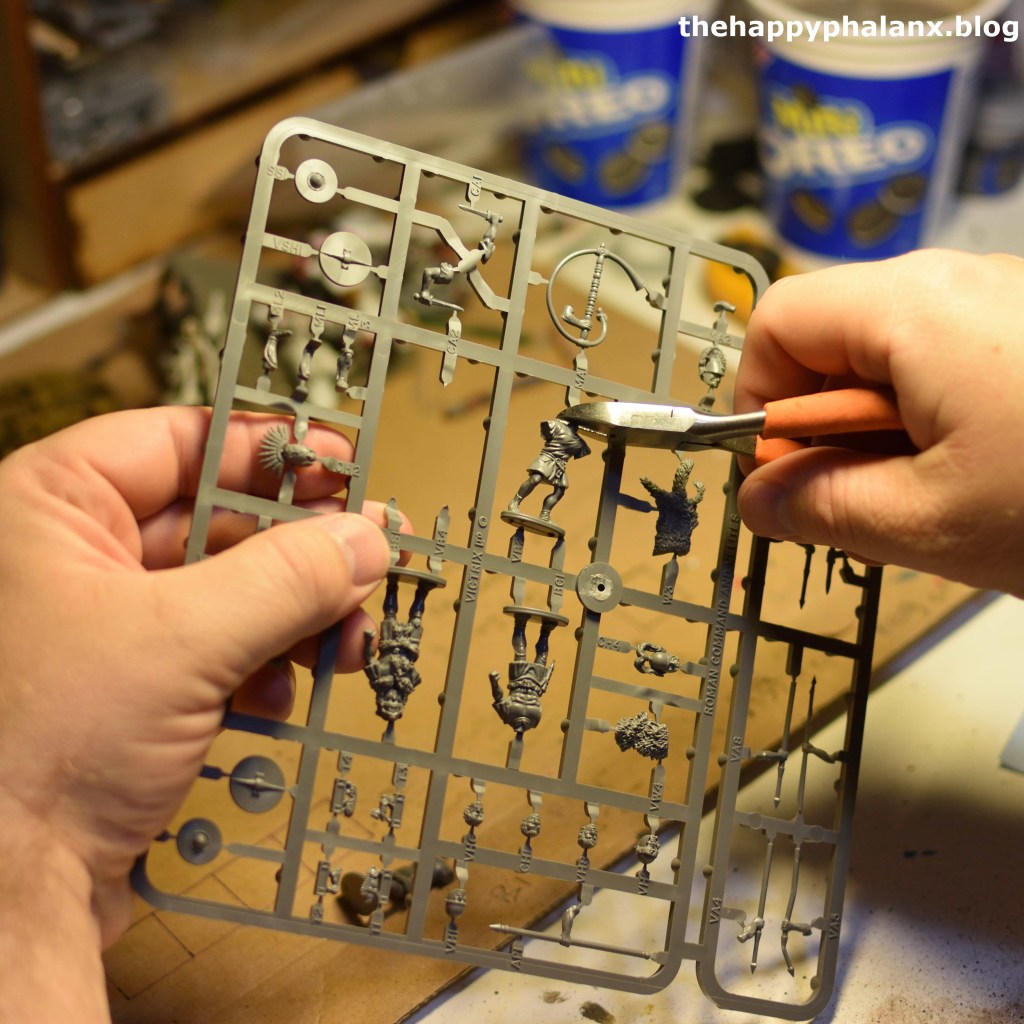
The first step in prepping your minis for painting is to carefully cut them from the sprue. Although this can be done with a sharp x-acto knife, or something similar, I find it is easier to use a pair of clippers for this purpose. I find it makes it go a lot quicker, especially if you are planning to prep a number of minis at once.
Step Two:
Here you can see all the pieces once you have cut them off the sprue. If you look at the base of the body, beneath the legs, you can clearly see the mold line across the base, as well as the nubs where I cut it free of the sprue. You may also see similar lines and/or nubs on the other parts of the mini as well. This you can carefully trim off using an x-acto knife. Be careful, because those knives are ridiculously sharp!

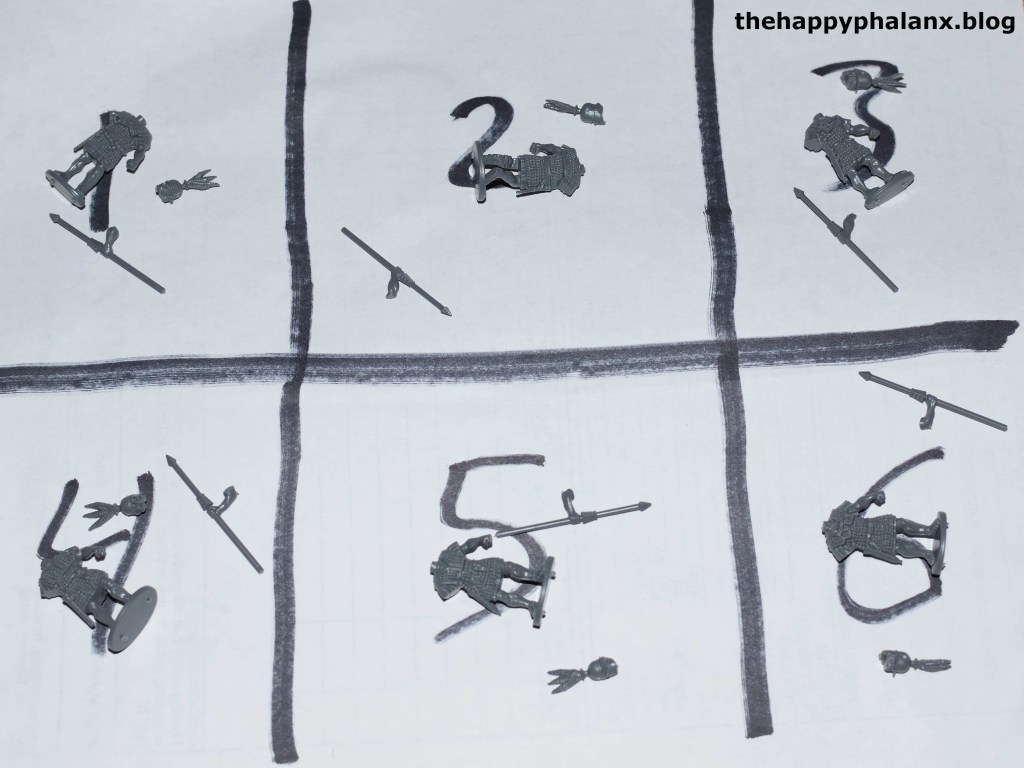
If you are assembling many minis at once, I find it helpful to create a quick grid on a sheet of paper and put the different parts in each box to make sure you have the right number of arms, legs, heads, etc. This was a shot from my Thanksgiving Prime-A-Thon last week, when I prep and prime all my minis so I have something to paint during the cold, long Canadian winter!
Step Three:
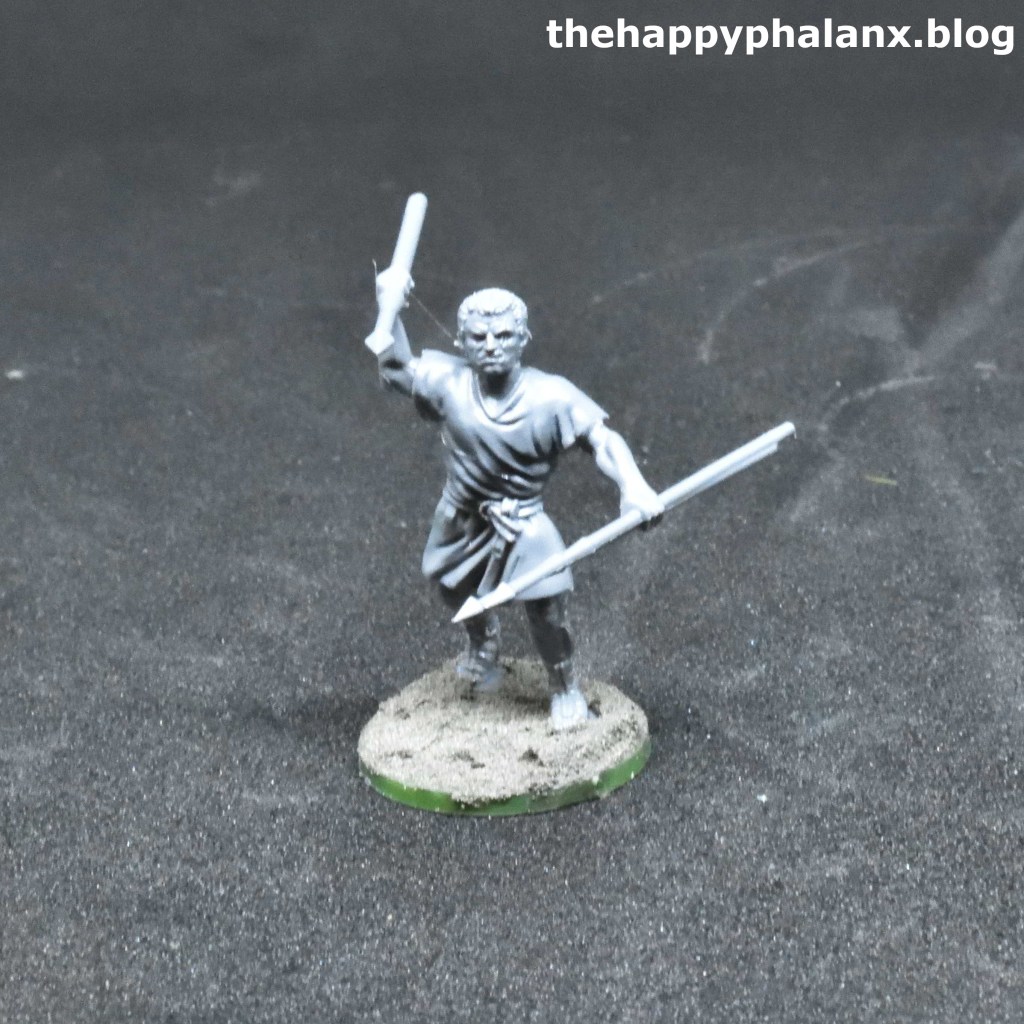
Once everything is cut out and trimmed, you can glue the mini together. If you look closely between the head and the raised verutum (a type of javelin, shorter and lighter than a pilum), you will see a thin string between them. This was from the plastic glue I used assembling the mini. I didn’t notice it at the time, but you can just brush it off before priming. You may also notice that I have added the basing paste to the bottom of the mini to create the appearance of rough ground beneath it.

Step Four:
The final step in prepping is to prime the mini. I usually prime in white because it results in the colours looking a bit brighter when the mini is painted. Black is also a popular colour to prime with, and is usually my choice for minis that are largely metallic, a high middle ages knight, for example.
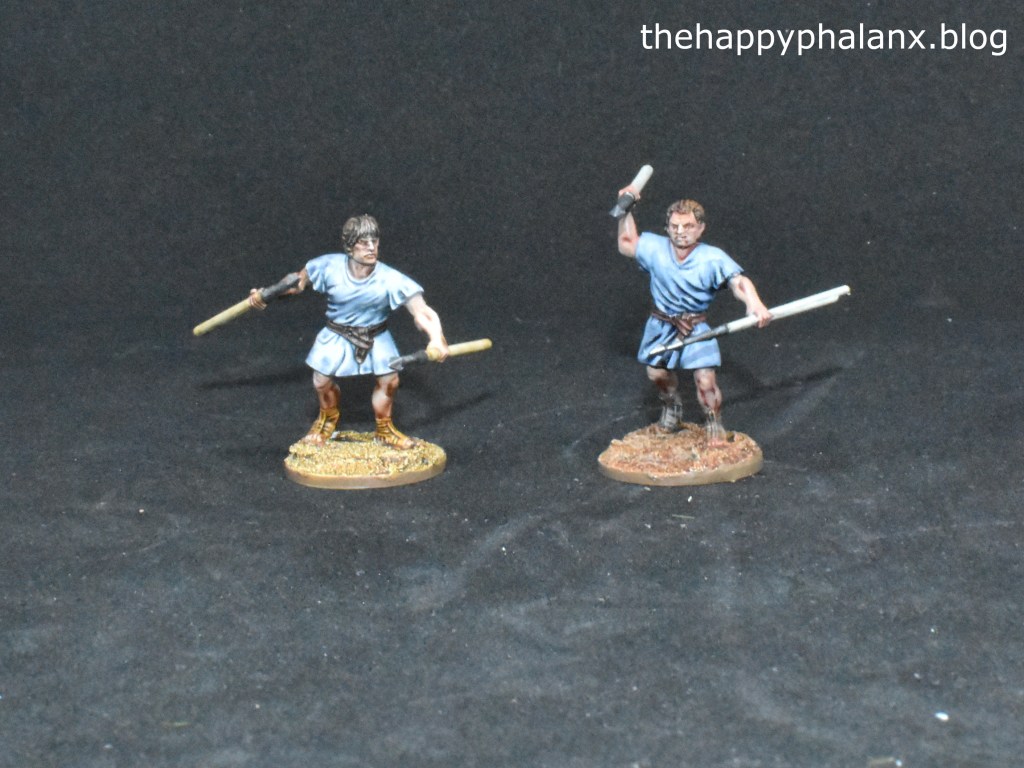
That’s it for prepping your minis! The next post I will use these two velites to demonstrate two different approaches to painting them. I am hoping to have that part up in early to mid-November…

Leave a comment